
Configure Sound Blaster 16 Drivers for Microsoft Windows 3.1
Note 1: applicable to Windows 3.1 and Windows 3.11
Note 2: you may be running it on physical hardware or VMware Fusion or VMware Workstation
Note 3: this will not work on Windows 3.0
Step 1: Backup
Make sure you backup your Windows machine (either virtual or physical) as this may save some grief if things go wrong later.
Step 2: Download the SB16 Drivers
Download the legacy sound card drivers from Creative. Search for Creative Sound Blaster 16 drivers or download directly from:
https://support.creative.com/downloads/welcome.aspx
The file we need is called SBBASIC.EXE, download it and copy it to a floppy disk or disk image.
Step 3: Extract Files
Create a directory to contain the Sound Blaster files called SB16, change to it with the CD command and then run the executable file we downloaded previously. Start your Windows machine and exit Windows back to the DOS prompt then type the following DOS commands:
MD C:\SB16CD C:\SB16A:SBBASICStep 4: Installation
You should still be at the DOS prompt in the C:\SB16 directory. Run the SB16 Windows driver installation program. Yes, it’s run from DOS to work in Windows…I know, those were the days alright!
INSTALLYou may get an error message saying insufficient memory.

In that case unload the CD-ROM driver and disable SMARTDRV if Windows has automatically configured that. Do this by putting remark statement (REM ) at the start of the line where smartdrv is in both CONFIG.SYS and AUTOEXEC.BAT.
Reboot and run the install from C:\SB16 as above

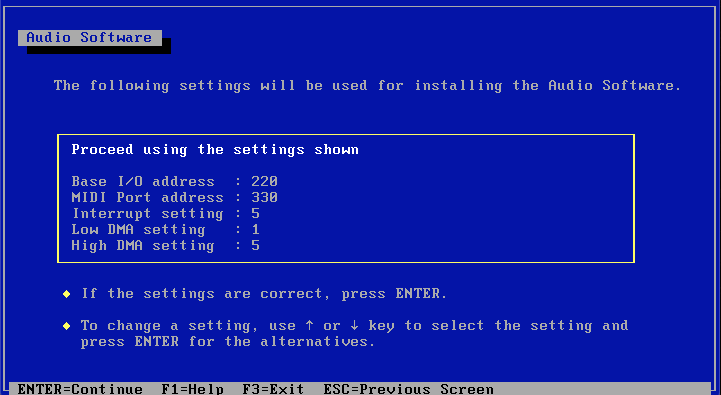
Press Enter at the first screen to continue and press Enter again at the second screen to accept the default directories.
I used the hardware defaults as shown here:
Port: 220, MIDI 330, INT 5, LDMA 1, HDMA 5
Feel free to change them if you are:
brave
know what you are doing
have actual hardware with different settings
all of the above
Press Enter to accept the remaining default values and if you have a more or less standard autoexec.bat and config.sys I would let the installation make changes to lose files too as it backs them up so you can go back if something breaks.

Step 5: Test
Restart your machine. If Windows does not start, all is not lost! This may be because you were fiddling with the Sound setup in Control Panel previously and Windows is now confused. To straighten things out we’ll need to run Windows Setup to check what went wrong. Exit Windows back to the DOS prompt and type the following DOS commands
CD\WINDOWSSETUPJust accept the defaults by pressing Enter. When setup exists back to DOS, start Windows by typing:
WINHopefully Windows made a sound when it started! There should be a new Program Group created called Audio Software but first go to Control Panel, Sound and click the Test button to see if the various sound files are playable.

Step 6: Check VMware Config
If it’s still not working and you are running Windows with VMware Fusion or VMware Workstation, you may need to tweak the hardware settings of your virtual sound card to match those you chose during the installation (see above).
You can do this by editing the .VMX file which may need more or more of these entries, and they need to match the settings you chose during the install step above:
sound.present = "TRUE"sound.virtualDev = "sb16"sound.opl3.enabled = "TRUE"sound.baseAddr = "0x220"sound.dma16 = "7"sound.dma8 = "1"sound.irq = "5"sound.mpu401baseAddr = "0x330"sound.Opl3BaseAddr = "0x388"sound.fileName = "-1"sound.autodetect = "TRUE"